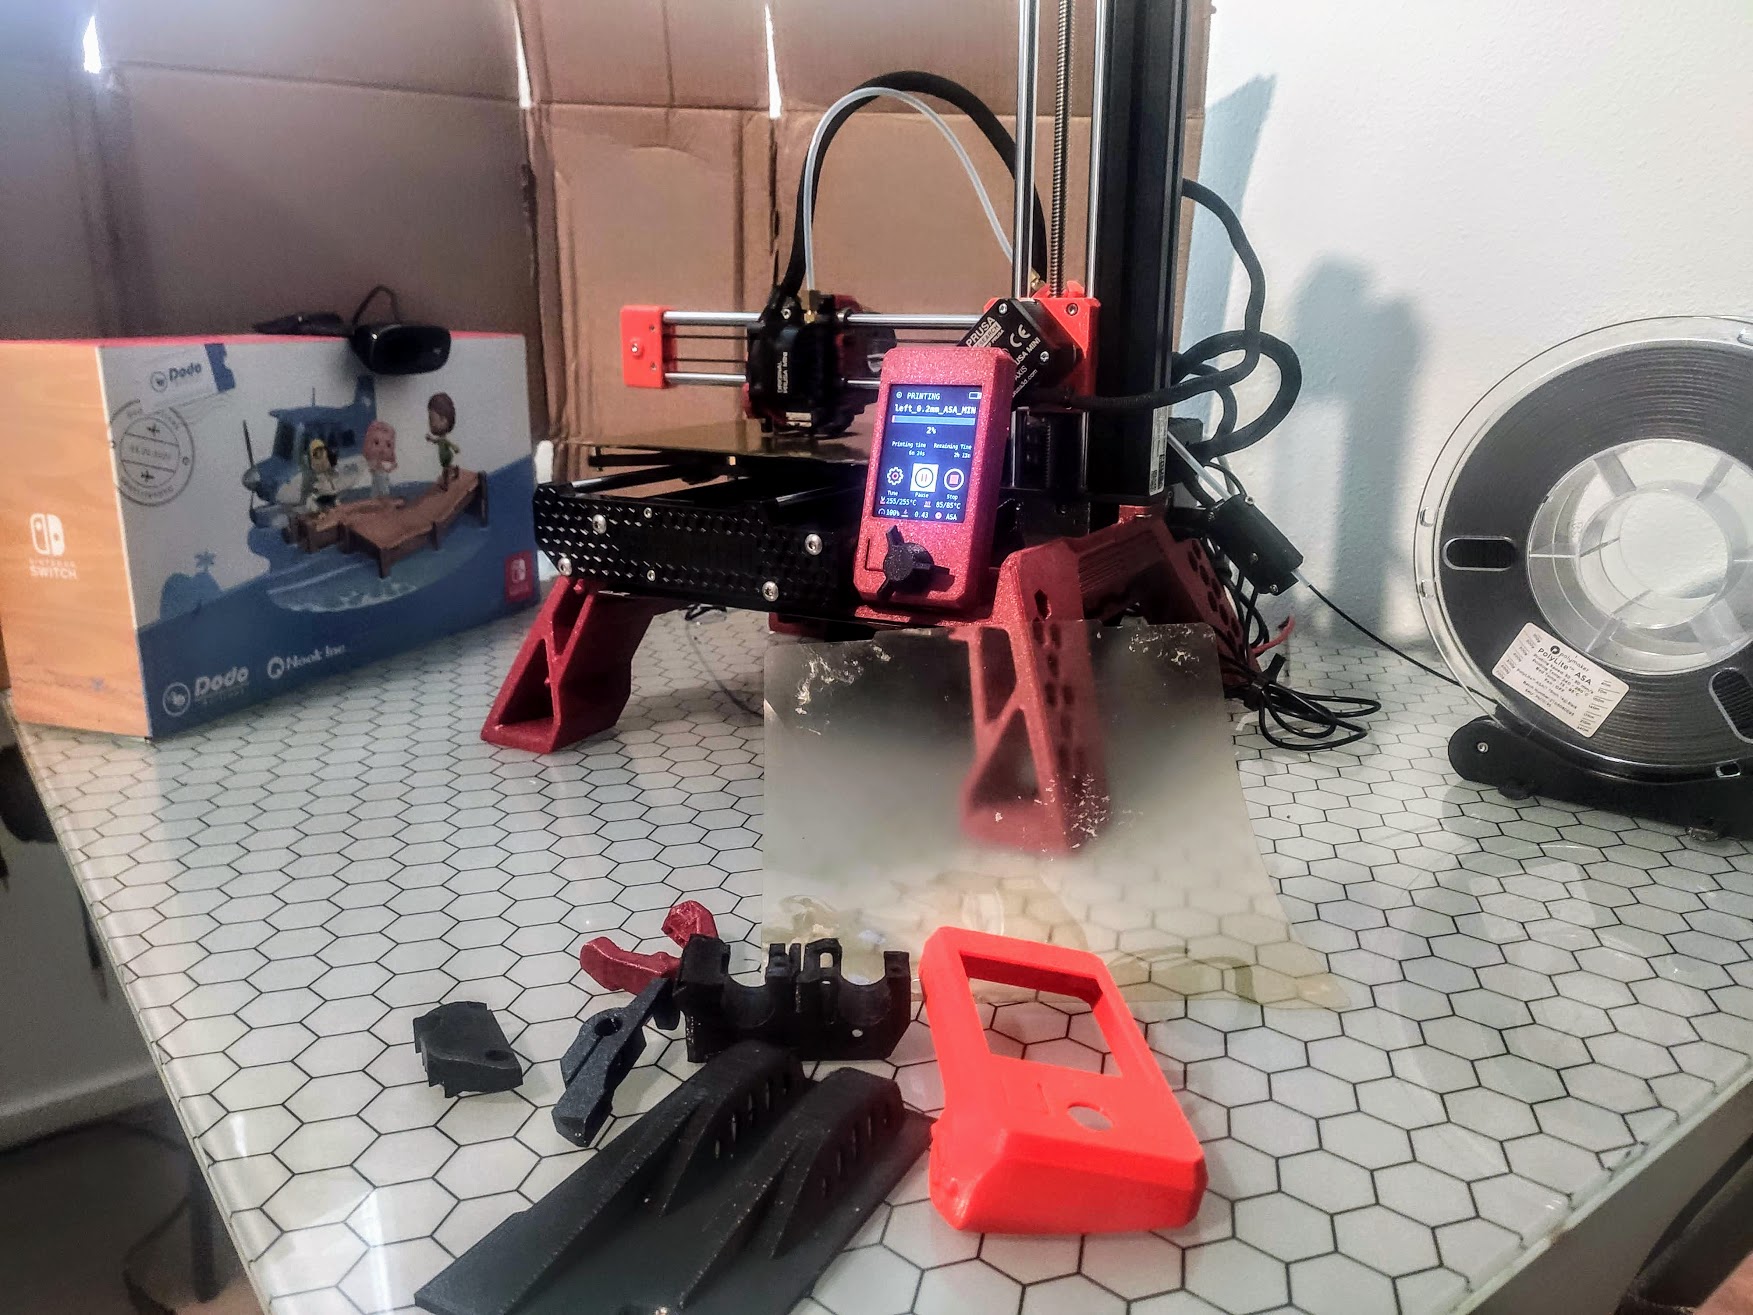
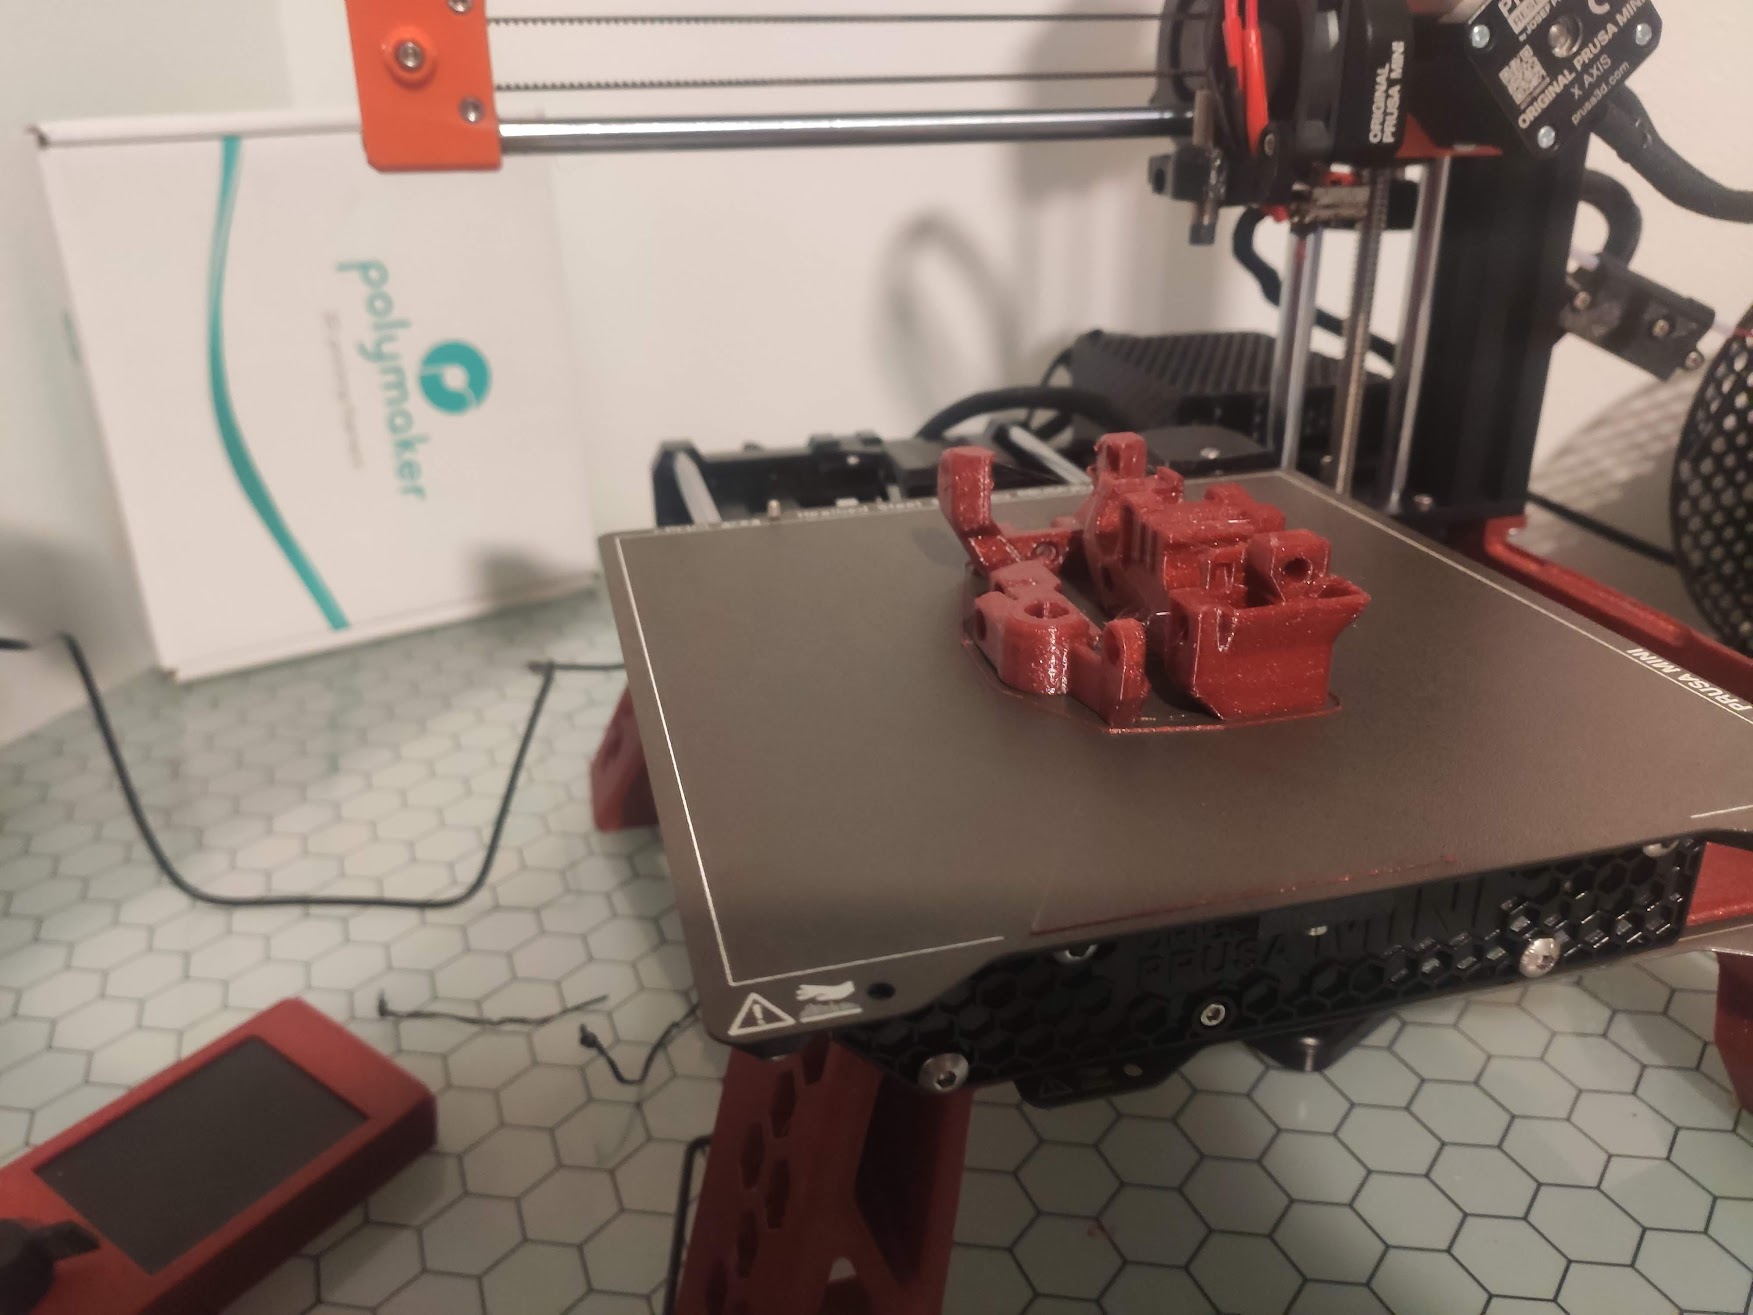
Vzbot330 Part 1

Time to go really fast

I spent quite a bit of time designing modifications for Vorons, and couldn't really agree with their limits and bad design choices. That lead me to looking for a better base printer design. I stumbled onto Annex and Vzbot series printers, and for cost reasons alone, I decided that a Vzbot 330 scratch build was what I was insane enough to build.

Why not a Voron?

I've got a few reasons that I am not interested in most Vorons. I won't get into personal disagreements with certain people, but just in design. Voron is not meant for speed. The designs are very well built for the speeds that they target, being "faster than most consumer printers", but they are not really built with the intentions of going much faster. The toolhead for example hangs on the front of the rail, and the rail on the front of the extrusion. That leaves a huge cantilever when doing fast Y movements on a CoreXY system, leading to inaccuracy, larger vibrations leading to ringing, more wear on components like the rails, ect. They pride themselves in looking really cool, and being easy to build for newcomers thanks to great documentation, and they nail that.

Why a Vzbot?

While Vzbot designs are still CoreXY, the design choices they made don't limit it nearly as hard as Voron designs. The toolhead sits on top of the rail, on top of the extrusion, and maintains a very stable center point without being heavy. Reduction of weight means that you will get higher accelerations before you get any ringing or ghosting. Vzbot also has great support for carbon fiber gantries, as well as machined aluminum gantries depending on your needs that weigh much less than 2020 extrusions, once again leading to more power to drive the print head, and less ringing.

Basic specs

  • NF Crazy hotend (Volcomosq Clone)
  • Sherpa Mini extruder
  • LDO Stepper Motor - Nema 17 - 42STH48-2504AC (A/B Motors)
  • TMC2209 Stepper drivers (24v)
  • Octopus Pro Mainboard
  • Asus Chromebox (Klipper pi replacement)
  • No probe
  • F3D MIC6 Alu bed
  • 120v AC heatbed

Part choice breakdown

I wanted a machine that was able to do at least 30mm^3/s, and the NF Crazy seemed like a good deal at only $65. When Vzbot parts were chosen, that was double that of the Switchwire, so nothing to sneeze at. The Octopus Pro mainboard is able to handle stepper drivers up to 60v, so that will allow for 48v stepper drivers to be used once they come back to markets as there is a part shortage at the moment. The TMC2209 drivers are only 24v, but they allow quite a high current as long as you have active cooling, and will do fine for the Z motor and extruder even longer term. As for the extruder, the sherpa mini was chosen due to it's high level of support on so many printers, Annex knows how to make amazing anything printer related, and it's light weight, so it fit right in. No probe and a single Z motor was a no brainer for me. No auto bed level when you can just never let it get out of level after initial calibration. F3D makes a very flat bed, so warping was not a concern, and I can just save all of that wasted probing time, and weight.

What kinds of speeds can it really hit though?

vzbot-speeds1

For accelerations, I'm running 10k accel, 10k decel on all visible features, and 15k/15k on features internal that won't be seen. Travels speeds are 1m/s 15k/15k accels.

This is substantially faster than Switchwire. That machines is limited to only 200mm/s and between 2k-10k accels, but most are closer to 2-5k. This reduces print times massively both on small and large objects thanks to the higher average flow rate.

Eventually

This machine is still not enclosed, so it will get more rigid over time, as well as just being able to print materials like ABS and ASA better in the hotter ambient temperatures. I'm quite happy with the speeds that I'm getting with only 24v, but eventually 48v is a must. Lower current for the same speeds if nothing else, which is better for the motors, especially once enclosed as the temps will creep up. I may add a few more things here and there as I need them, but it's all up in the air, and I'm enjoying the new toy at the moment. I'm sure eating through filament at a rate I've never seen before though.

Some pictures

vzbot_2 vzbot_1 vzbot_first_layer vzbot_battery_Box

CAD update for speedy boi

Speedy boi update

I've been learning some CAD to start planning. I'm leaving the design to be ready for 48v steppers, so they will be shown, though may take a cuple of iterations to actually include. So far I've got the carbon fiber gantry modeled, as well as a backpack to relocate all of the DC electronics to, banishing the 24/48v AC power supplies and SSR to the basement where they won't be touched. Also shown is the Mantis toolhead that will be pushing some massive plastic, as well as giving a much needed cooling upgrade over a single 5015 fan of the Stealthburner, not to mention the weight reduction. Note that the backpack won't be translucent, but it's impossible to see things if it's shown in black in the slicer, so bear with me on colours ect.

Changes since last post

  • Backpack designed
  • Switched to flying gantry (2.4 vs Trident base)
  • External steppers (shown in back) for A/B motors. More power, and actually able to purchase

Front

ss_r1_front

Back right

ss_r1_back_left

Back

ss_r1_back

Bottom

ss_r1_bottom

Time for a new printer

Time to go fast

While my switchwire has been a lot of pain, and fun, but mostly pain, I'm back at it. There's some things that I love, and hate about the switchwire, and while I intend to still use it, I think it's time to build something that not only addresses those problems, but goes faster. This is just a really rough writeup of my thoughts that will change over time, but is here to keep track of what the plans are, and how they change over time.

The plan

The current plan is to start with a Voron Trident kit from Formbot, similar to where my Switchwire started from, and modify it to hell and back. The Trident is a fixed gantry CoreXY printer, which is generally pretty fast, even compared to my Switchwire already, but the need for speed is a thing. Mods will be broken down into 4 categories. QOL, Speed, Quality, and Eventually.


QOL

180 degree hinge allows the doors to completely open. Not needed, but sure nice to have.

Hinge


Sexbolt is one of the biggest QQL mods. This allows for nozzle to probe auto calibration, making things a lot more reliable, especially when thermal expansion starts to kick in.

Sexbolt


Klicky probe allows for probing of not just metal sheets, but any material you could want to print on, and will pick of thickness changes, making this and the nozzle offset auto calibration some massively useful QOL. It also makes the gantry lighter.

klicky

Quality

Pins mod will actually be done with carbon rods for a lighter gantry, but also increases the print quality by preventing any catching on the threads that are normally used as pins on a stock gantry.

pins_Mod

Speed

Mantis toolhead is designed to add two 5015 fans to the toolhead for much better cooling, reduces weight, adds a sherpa mini extruder for more power and weight reduction, and supports insane hotends like the Volcano Dragon hotend, that adds volcano nozzles to the already high flow dragon hotend.

Mantis


Endstop relocation goes along with the Mantis toolhead to add the endstop back.


Ramalama idlers add back most of the build space that was removed due to the difference in shape of the Mantis toolhead, as well as making them stiffer, which should help with resonance.

idlers


Carbon fiber gantry, to replace the 2020 extrusion. This saves massive weight, not only helping the motors not skip steps, but helping immensely with resonance at higher accelerations. This will allow for much higher input shaper tolerance of high acceleration, and should at least get to 25k accel without any noticeable smoothing due to input shaper.

tube

Eventually

48v motors are on the table for one day, but due to the chip shortage, there are absolutely no driver boards to be found in stock, even from AliExpress. There are several options on the table in terms of driver boards, to motors, to controller boards to house the drivers, but it will come down to what I can source, as opposed to what I want.

Conclusion

This project has been started in a sense. I've ordered the carbon rods, carbon fiber shaft, and a sherpa mini with some other small things on the slow boat, but the core printer isn't set in stone. I'm looking to iterate on ideas and change my mind, but I'm taking quite a lot of tips from the Annex engineering, HevORT, and VZbot teams. We'll see what else helps push this printer to go fast, but also be reliable, as far as what a 3d printer really can call reliable.

Building a printer: Day 5

This has been.... A journey...

I have submit for, and gotten, a serial number! I am now the proud owner of VS.288 and yes, the audio quality is bad, but I have no clue how to use Davinci Resolve.

Trials and tribulations

This has been both easier than expected, and an absolute nightmare. I've worked with klipper before, but this was my first printer built from scratch, and it shows. I had massive issues with microfit connectors, so things like toolhead wiring is all soldered, and countless other issues here and there, but it works, and it works fast. I've modded the printer a ton from the kit that it started as. I'll try to list the mods here, though it's not exhaustive. I'm sure there are things I've missed.

  • Dragon hotend swapped in

  • Y belt tensioner mod because stock it was impossible to get correct, and even new belts had to be ordered to fit this mod in.

  • AB-BN It's no secret that Voron designs are built for ABS. I've upgraded the cooling to print materials like PLA better, and it looks so much nicer.

  • Fan mount There's already too much tape in the enclosure, so mounted the fan with a proper mount for the under side.

  • Quickdraw probe not seen in video as it was installed over the last few days after the serial video. It should get more accurate results for a better bed mesh, and isn't prone to drift with heat. Something I'm told hotends get is hot, so that seems like a bad mix with inductive probes.

  • STM32_Mini12864 Added a display because I could. It has no use, but it sure looks cool. This made it easier to wire up considering how little I care.

Where I'm at now

Print quality is nothing short of great considering the speeds, and I'm still in the process of tuning. I've added a port to connect an ADXL345 accelerometer that sits on the bed and the toolhead to measure resonance and compensate for it in firmware due to the speeds that I push.

Speeds and accelerations

switchwire_speeds

; ACCEL: 2000/2000/8     for First Layer
; ACCEL: 7000/7000/8     for Travel
; ACCEL: 1000/1000/8     for TYPE:External perimeter
; ACCEL: 2000/2000/8     for TYPE:Overhang perimeter
; ACCEL: 2000/2000/8     for TYPE:Internal perimeter
; ACCEL: 2000/2000/8     for TYPE:Top solid infill
; ACCEL: 4000/4000/8     for TYPE:Solid infill
; ACCEL: 5000/5000/8     for TYPE:Internal infill
; ACCEL: 5000/5000/8     for TYPE:Bridge infill
; ACCEL: 5000/5000/8     for TYPE:Internal bridge infill
; ACCEL: 2000/2000/8     for TYPE:Thin wall
; ACCEL: 2000/2000/8     for TYPE:Gap fill
; ACCEL: 5000/5000/8     for TYPE:Skirt
; ACCEL: 5000/5000/8     for TYPE:Support material
; ACCEL: 5000/5000/8     for TYPE:Support material interface

Resonance is being handled in software, allowing even a bed flinger to run quite fast as seen in the video above to result in amazing quality, and blazing fast print times. The serial video cube printed to voron spec in 2h31m45s coming in at a massive 57g and 60mm in all dimensions. I'm still not quite happy with the results, so I'm going through this amazing print tuning guide, and dialing in results. There may be room to increase print speeds a bit more here and there, but I'm already maxing out the hotend currently on infill, and with anything higher than a 0.4mm nozzle, so I'll have to go high flow heatbreak, and/or CHT nozzles to get more speed for big parts if I so choose.

What's next?

I've got a lot of tuning to do still, but want to get into some more advanced materials. TPU, PC-Nylon's and anything this printer can print to see what all is possible. Multi colour prints are also on my radar, but I'm sorting through the mess of options for that before I really decide on what I want on that front. I'm waffling on building a V0.1 as well to have a printer than can just print parts stupid fast so I don't have to keep a million spares on hand as well, but undecided if I want to go that route, or just save up for something bigger, or if the Prusa mini is good enough. Only time will tell on these things it seems.

Random things I've printed on the Switchwire

Belt tension mod

sw_print_1

Holder for ADXL345

sw_print_2

Input shaper tuned wrong

sw_print_3

Bed flingers one downside, high accel doesn't go well with thin tall objects

sw_print_4

Keycap printed in less than an hour. Looks as good as the one on the prusa mini that took 3.5 hours.

sw_print_5

Foxes are cute, so I printed one to do a detail check

sw_print_6

Printing a tuning tower for pressure advance. The QuickDraw can be seen in this image finally.

sw_print_7

Afterthoughts

While this isn't "done", I don't think it ever will be. I'm not trying to sell anyone on anything here, but if you do happen to need something printed, and can't print it because of lack of print space, or material incompatibility or just don't own a printer, feel free to reach out. I'm sure I could squeeze in some time for you to get your cool idea made, or even just something you want at a cost that's reasonable. I have a really fast printer that's able to print some amazing things, so I'd rather share that with others as opposed to hog it all for myself.

Bonus

All of my configs for my Switchwire can always be found here and are always kept up to date. As for my slicer profiles, they can be found here for my primary profile, and my tamed profile for tall thin objects is here. I also have my post processing scripts here for all of my voron profiles, and probably other printers eventually.

Back from vacation

I'm not dead

It's been a while since my last update. Life has been busy. Friends visiting from across the world, constant work on the Voron Switchwire, and the usual life things all keeping me busy. Content has been a bit light, but I have a backlog of things to talk about now that I have some free time thanks to the holidays, I should be able to get more content out. I don't keep a backlog of content to delay out posts, and would rather keep things as up to date as I can. I'll be posting an update on my Voron soon, and I hope this one was worth the wait. It sure has been an adventure for me, and it's still not over.